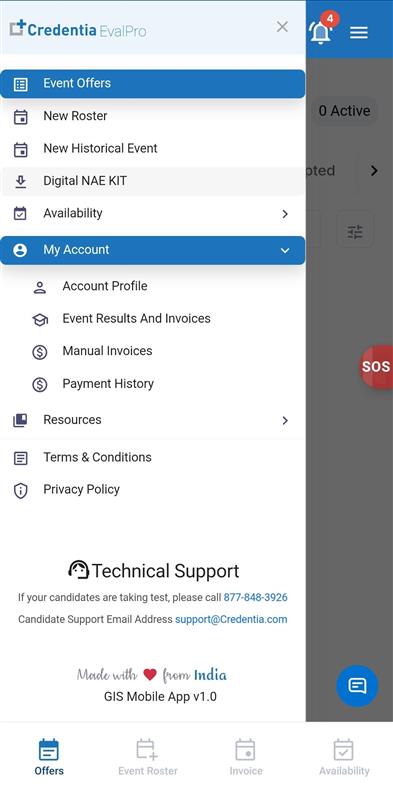
My Account
My Account section allows you to edit your personal information, create manual invoices, and view your payment history.
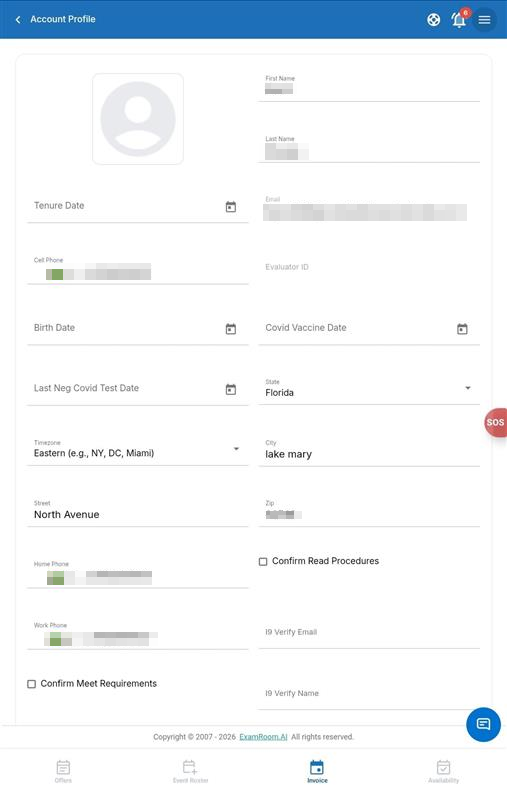
Account Profile
The account Profile window allows you to add, view, and edit your personal information.
Viewing and Editing Account Profile
To view and edit your Account Profile, follow these steps:
- In the My Account section, select Account Profile from the dropdown.
- Check and confirm the details entered in the Account Profile section. You can edit your account details and update them.
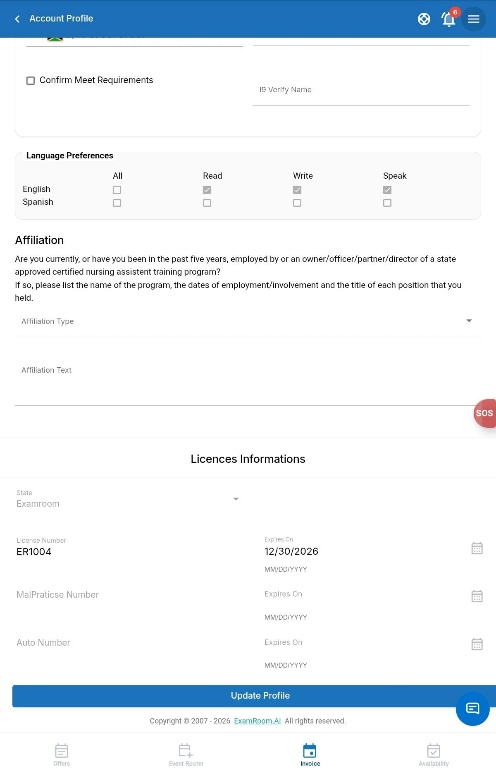
- Check the Affiliation and select Affiliation Type from the dropdown.
- Enter Affiliation Text.
- Tap Update Profile to update your details.
Note: Verify that you have entered all the mandatory fields.

License Information
In the Account Profile section, you can view your license information.
To view your License, follow these steps:
- In the Account profile, scroll down to the bottom section to view License Information.
- The information includes State, License Number, License Expires on, Malpractice Number, and Auto Number.
Event Results and Invoices
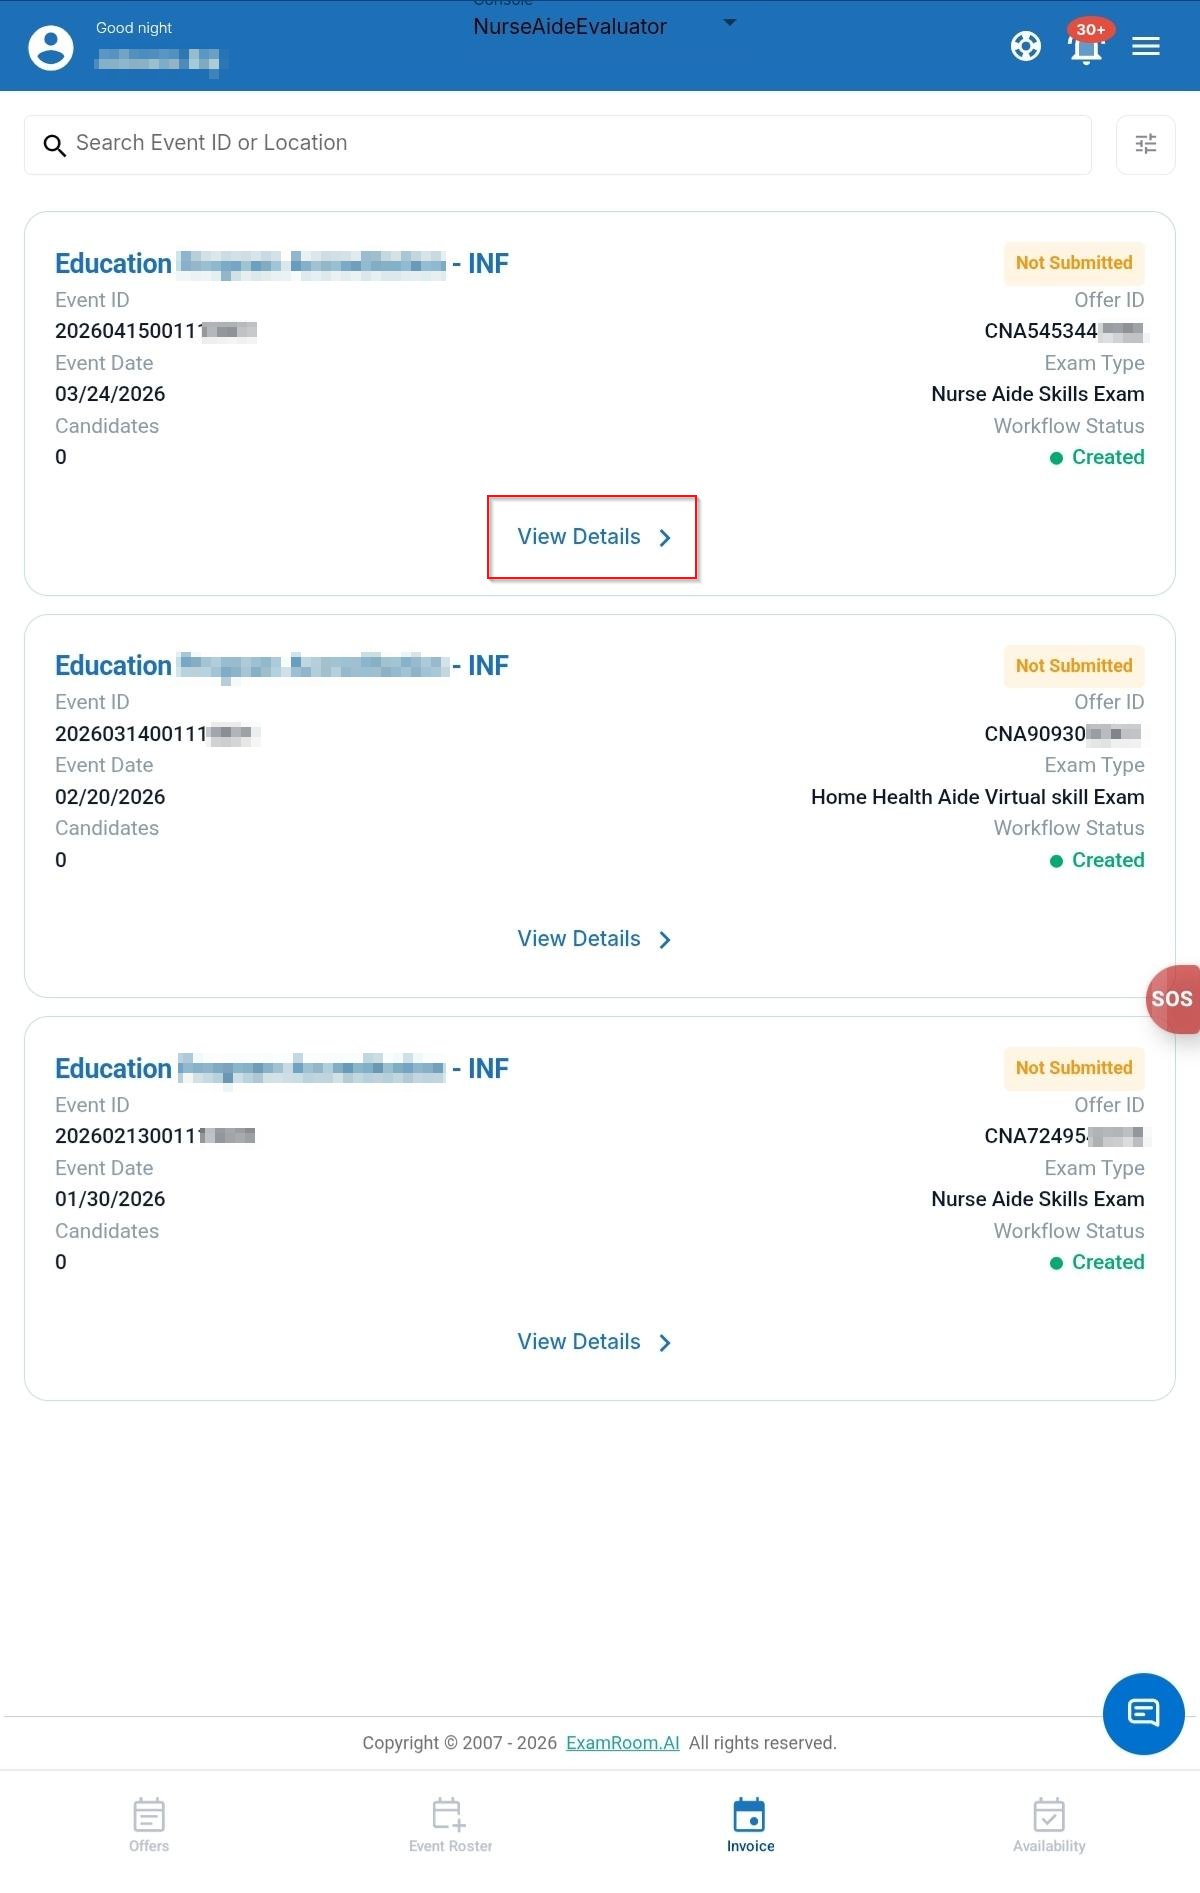
The Event Results and Invoices window displays the list of invoices generated for the events you attended, along with their statuses. It includes a facility report section to document actual conditions and rate the facility, a general exam feedback section to provide exam-related feedback, and a section to view your invoices for the Event. It also includes candidate incidents if any incidents are marked in the events.
In the invoice section, if you find any discrepancies on your invoices, you can raise a concern for re-verification. Once you submit your report, the Credentia Operations team will review and process it.
Note: NAEs are expected to review and submit the Event Results and Invoice within 24 hours of completing an event.
To access the page,
- Go to Invoice from the bottom section or select Events Results and Invoices from the dropdown in the My Account section.
- In the Invoice section, you can view the list of generated invoices (for each event) with their General Information displayed in the info box. Select the required Invoice with the status Not submitted that you want to submit.
- To select, tap View Details of an invoice to view complete details.
- Event Results and Invoices contain four components:
- Facility Report
- General Exam Feedback
- Candidate Incidents
- Total Time & Expenses
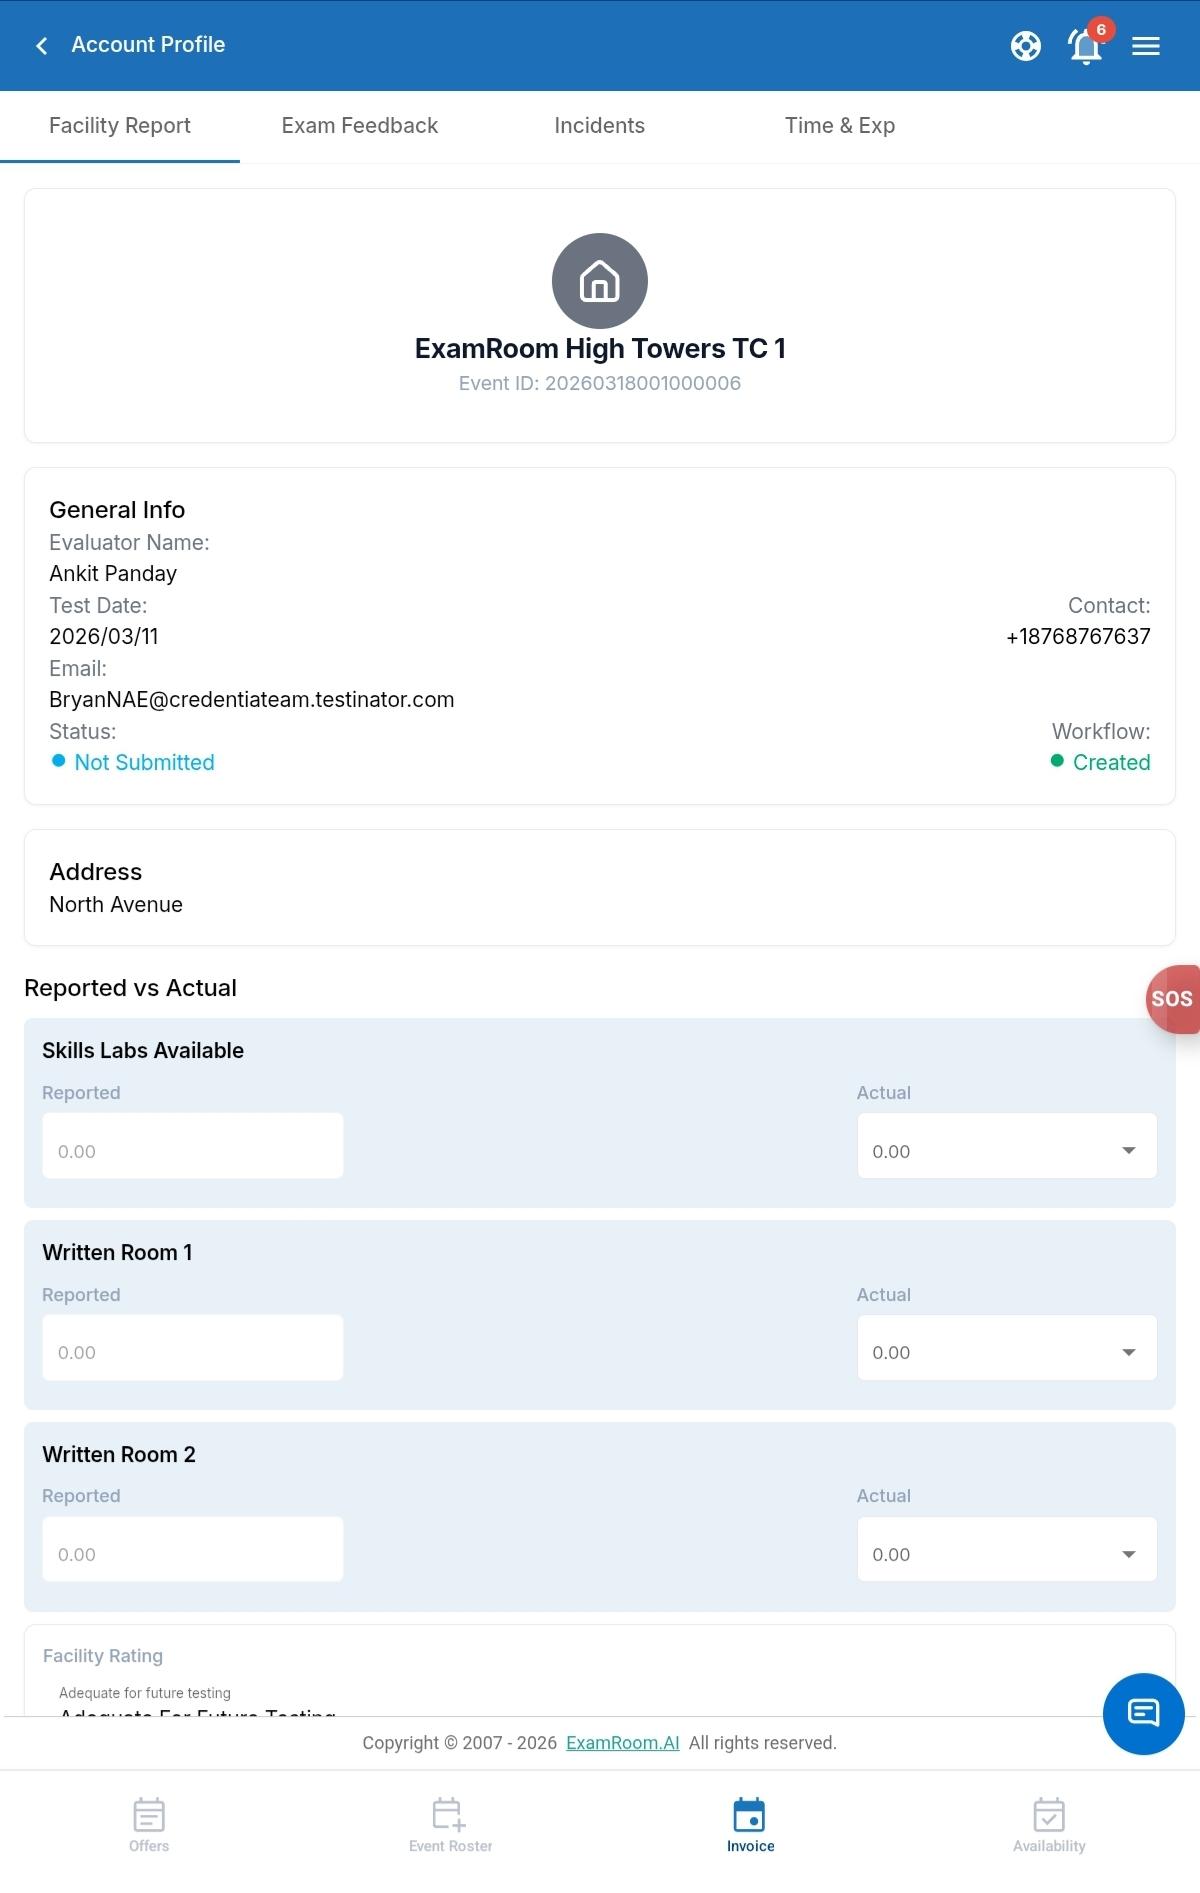
Facility Report
The Facility Report section allows you to provide feedback regarding the facilities. Your feedback will be recorded and used to help the test centers address any issues or make improvements, if necessary.
Note: It is not mandatory to update all the fields.
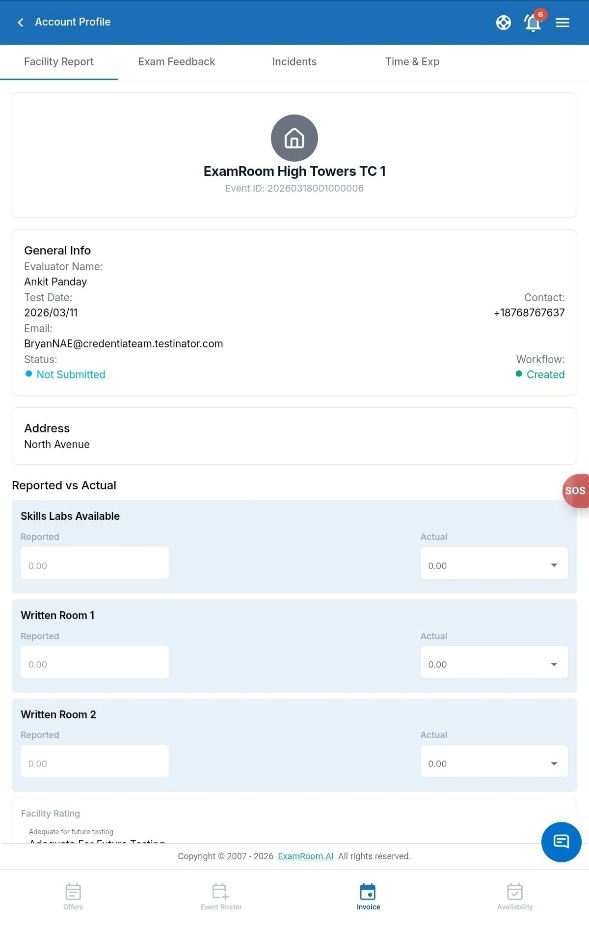
In the above field, reported values are recorded based on the values provided by the test centers. If there is any discrepancy in the Actual Values, you can provide your values by selecting from the Actual dropdown menu.
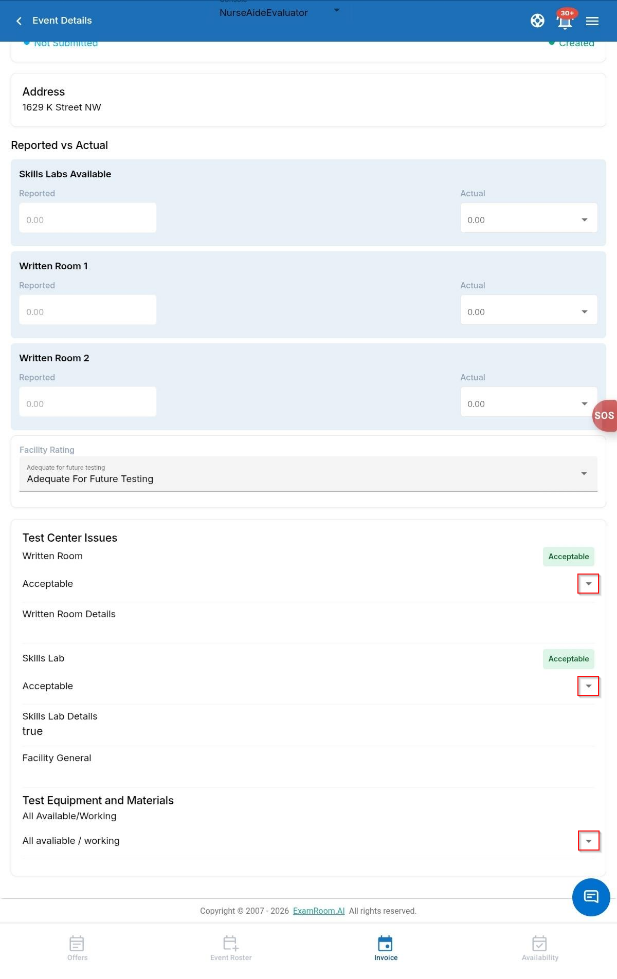
Facility Rating
- Tap Facility Rating and select the options from the dropdown menu shown below.
- Adequate For Future Testing.
- Issues Requiring Review.
- Minor Intervention Required for Future Testing.
- Major Intervention Required for Future Testing.
Note: It is mandatory to update the facility rating.

Test Center Issues
The Test Center Issues field allows you to update the issues faced in the test center. The facilities are categorized into Written Room, Skills Lab, Facility General, and Test Equipment and Materials.
- In the Written Room and Skills Lab tab, tap and select either Acceptable or Not Acceptable from the dropdown menu.
- In the Test Equipment and Materials section, tap and select either All available/working or Missing equipment from the dropdown menu.
Exam Feedback
The Exam Feedback option allows you to provide valuable feedback about the exam. It also displays the Final Scoring Results of the Event Offer.
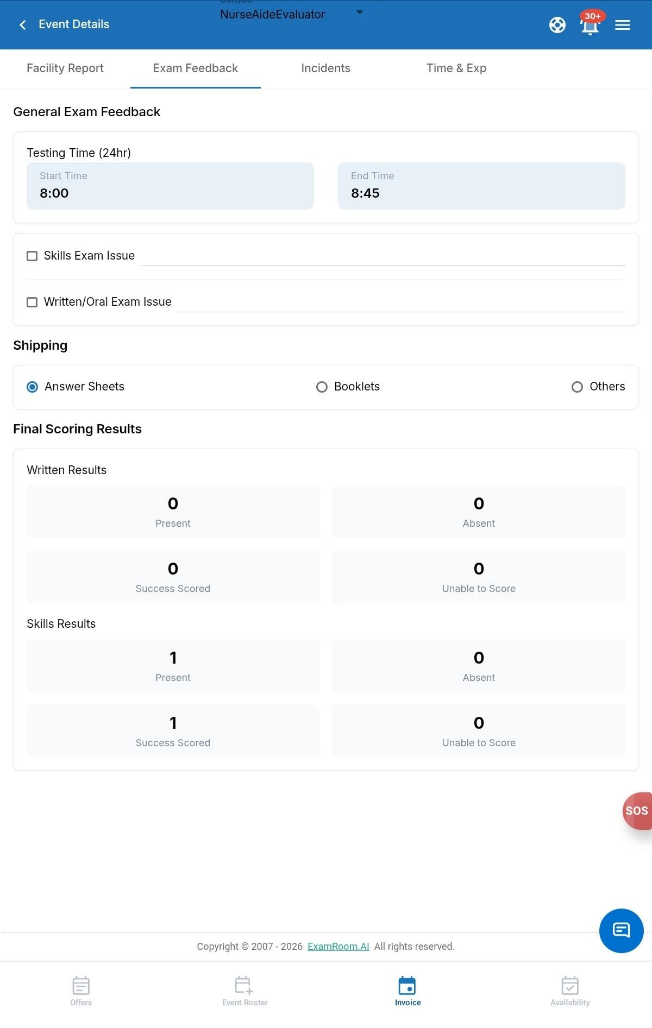
| Field or Icon | Description |
| Testing Time Start/End (24hr) | Displays the Start and End time of the Event. |
| Skill Exam Issue | Allows you to update the issue faced during the skill exam. |
| Written/Oral Exam Issue | Allows you to update the issue faced during written/oral exams. |
| Shipping | Select Shipping from the options below:
|
| Total Present Written/skills | Displays the number of candidates present for the test. |
| Total Absent Written/skills | Displays the number of candidates absent/marked issue for the test. |
| Total Successfully Scored (Written and skills) | Displays the number of candidates who scored successfully on the respective test. |
| Total Unable to Score (Written and skills) | Displays the number of candidates who failed the test. |
Incidents (Candidate Incidents)
The Candidate Incidents section lists all incidents recorded involving the candidate during the event. If no incidents were documented, this section will be empty.
To edit the incident details, tap Update (other information is non-editable).
Time and Expenses (Time & Exp)
The Total Time and Expenses section displays the actual payment for the event. You can view detailed information on your payment for the event. Check and confirm all the details of your payment, then select the checkbox.
Note: These items will already be populated for you based on the event, i.e., the time you checked in, the number of candidates completed, and the round-trip mileage to and from your place of residence.
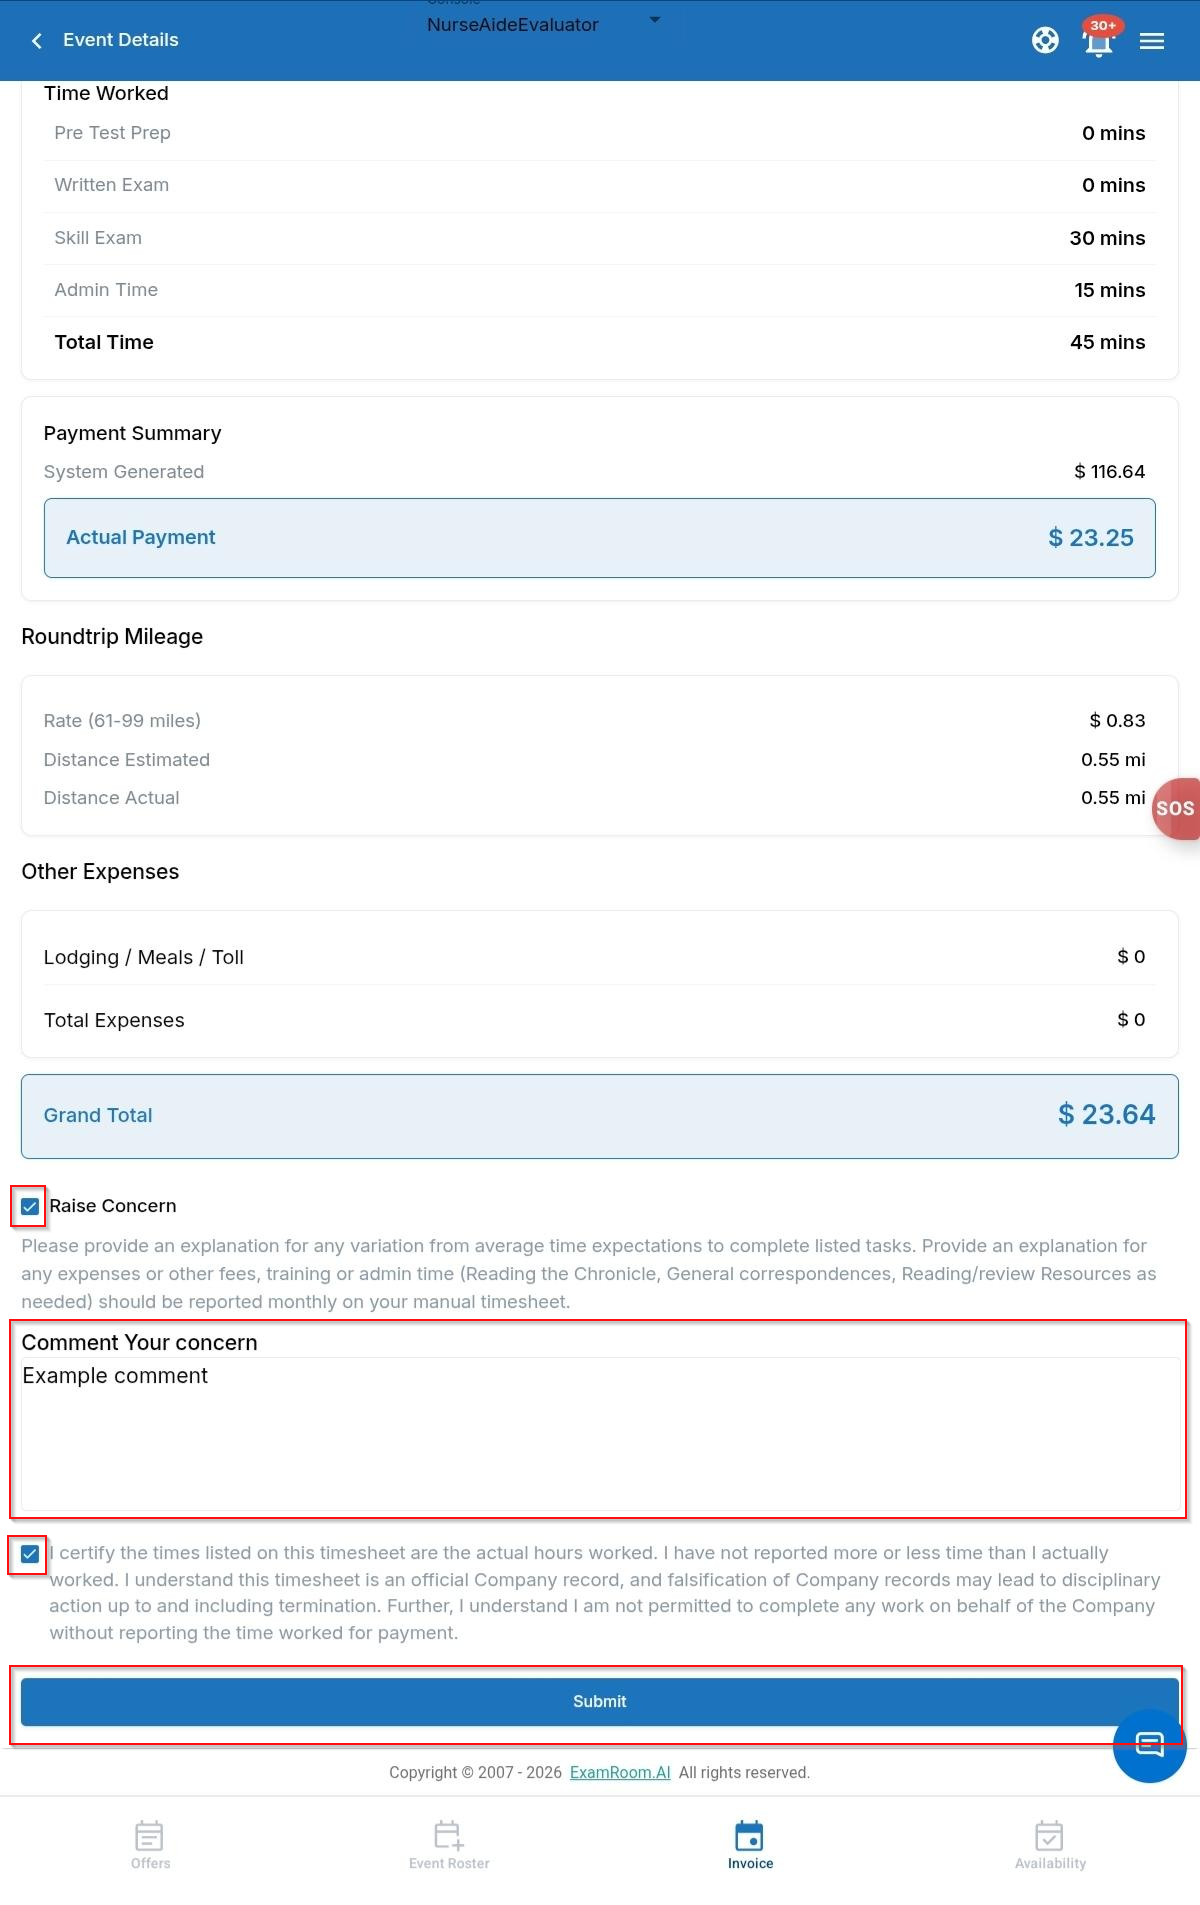
This section is divided into six parts: total time & expenses (work-type breakdown information), payment summary, round-trip mileage, other expenses, and actual total time and expenses.
- Total Time & Expenses:
- The ‘Total Time & Expenses’ section may include the following breakdown categories accounted in time duration: Pre-test preparation time, Written Exam (only for the written exam), Skill Exam (only for the skills exam), and Administrative Time. These work hours are recorded in hours and minutes for verification.
- The total minutes of the work and total amount are displayed based on the time worked calculation for the above-listed categories.
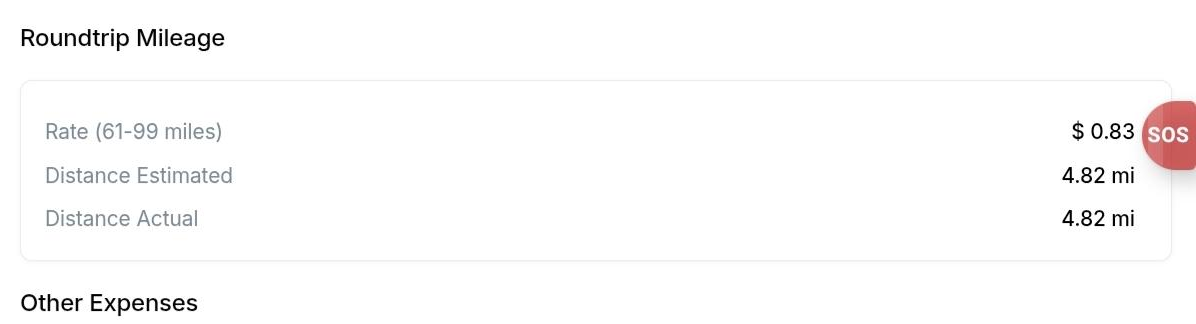
- Roundtrip Mileage: In the round-trip mileage section, you can view the mileage rate amount for the actual distance.
- The standard mileage rate per mile is calculated based on the total round-trip distance traveled by the NAE for the event, from your home of record to the test center.
- Mileage Rate: This section lists standard rates for various distances provided in miles.
- Estimated Distance and Estimated Mileage Rate: These estimations are based on pre-knowledge round-trip distance details between the event's host and NAE’s addresses.
- Other Expenses:
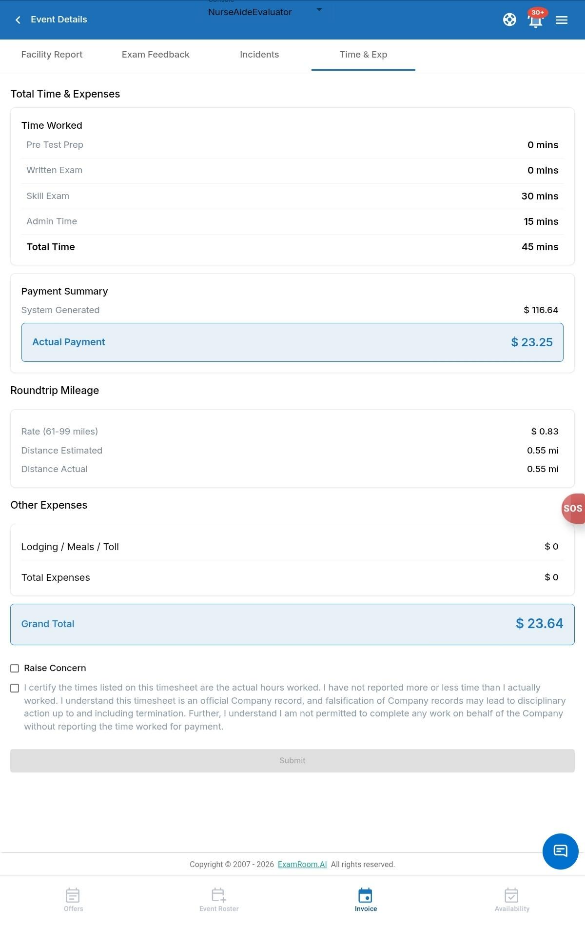
If you travel more than 100 miles for an event, you can claim additional expenses such as lodging, meals, tolls, parking, and other related costs. This must be approved by management.
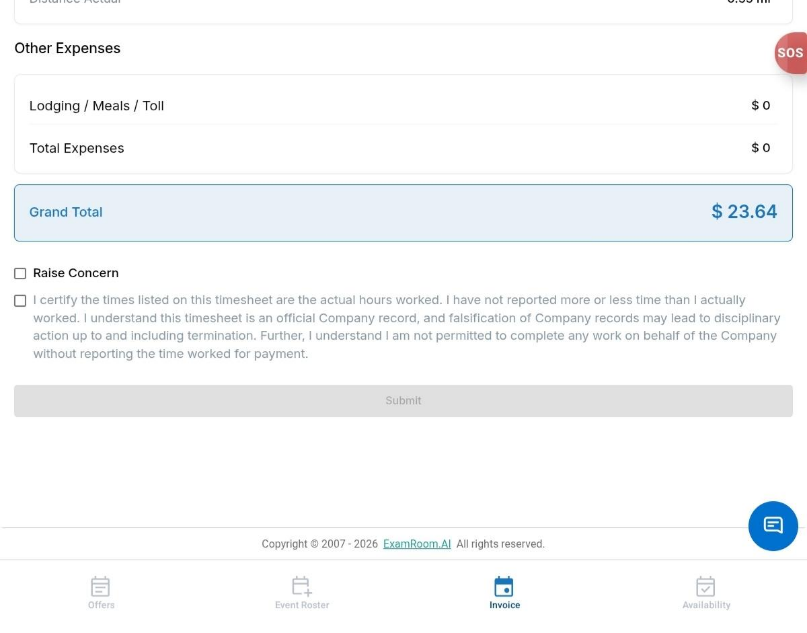
After reviewing all tabs, select the checkbox and tap Submit to complete the Event Results and Invoices.
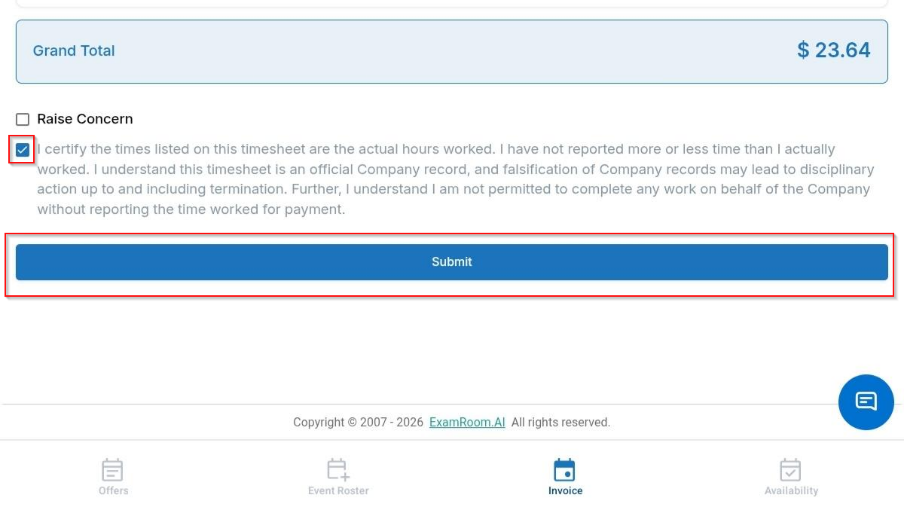
Note: If you have any discrepancy in your payment, you may choose the Raise Concern option.
- Raise Concern:
If you have any queries regarding the payment, raise concerns by tapping the Raise Concern button in the Total Time & Expenses tab. This will switch all tabs to edit mode, allowing you to update the data.
Note: The request for the ‘Raise Concern' option will undergo a manual verification process, and only invoices that are approved will proceed to the payment stage.
- In the Total Time & Expenses section, you can modify the actual hours and minutes according to the respective categories.
- In the Round-Trip Mileage section, add the actual distance in the Distance Actual field.
- In the Other Expenses Over 100 Miles section, you can enter the actual values in the respective category if you travel more than 100 miles for an event. The submitted additional expense request may include relevant claim documents. Tap the Add File icon and upload the relevant document.
The Actual Total Time and Expenses section displays the calculated total of all added expenses.
After editing the required details, follow the steps below:
- Enter the details in the Comment Your Concern section.
- Select the check box.
- Tap Submit to submit the invoice.
Invoice and Workflow Status
| Invoices Status | Workflow Status | Description |
| Not Submitted | Created | When the event is completed. |
| Accounting Review Approval | Submitted | When the Event Results and Invoice are sent for manual review. (If the submitted invoice is with Raise Concern modification.) |
| Management Review Approval | Submitted | When the Invoice is escalated for further manual review and verification. |
| Wait Support Doc | Rejected | When the Invoice is sent back for resubmission with the required additional supporting documents. |
| Waiting Export | Approved | When the Invoice is approved and queued for the scheduled payment processing. |
| Waiting Export | Rejected | When the Invoice is rejected after manual review. (If the submitted invoice is with Raise Concern modification and it is rejected.) |
| Exported | Approved | When the compensation report runs and processes your payments. |
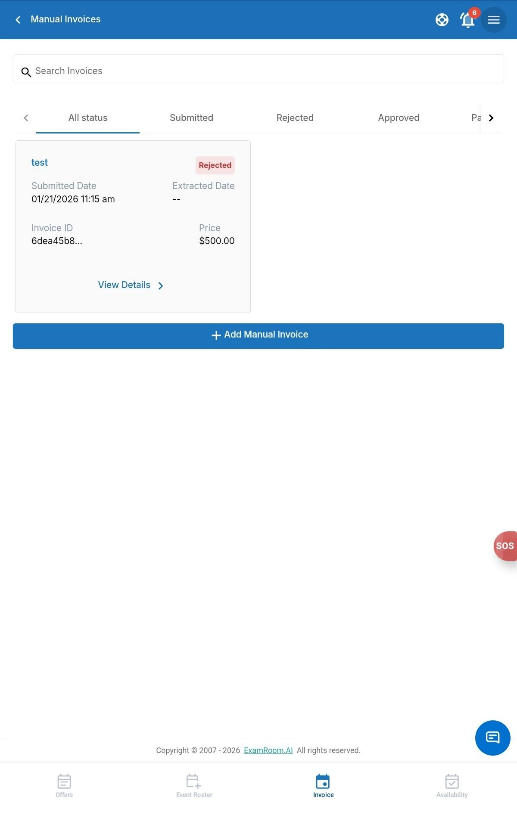
Manual Invoices
The Manual Invoices section allows you to add and view your manual invoices. You can reimburse bills that are not included in the standard payments offered at the event. After you upload the relevant documents, the Credentia Operations will verify and process your bills for payment.
The manual invoices are displayed in tabular format, where you can view the Status, Submitted Date, Total, and Extracted Date.
| Field or Icon | Description |
| Status | Provides you with the status of your invoices.
|
| Submitted Date | Displays the date on which the invoices are submitted. |
| Total | Displays the total amount mentioned in invoices. |
| Extracted Date | Displays the approval date of your invoices. |
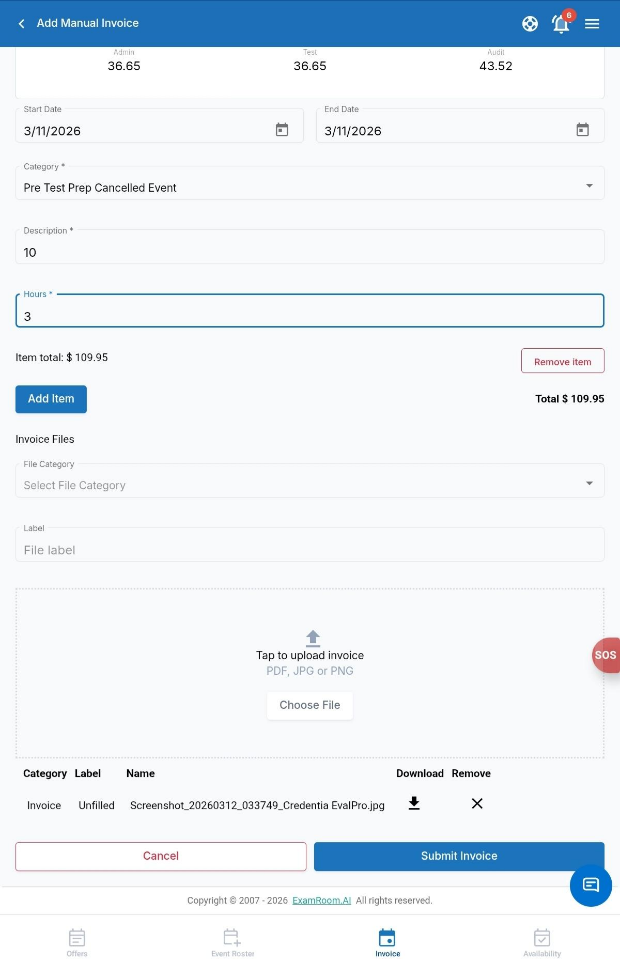
Adding a Manual Invoice
To add a Manual Invoice, follow these steps:
- Tap Add Manual Invoice on the Manual Invoices page.
- You can view the standard rates for the Admin, Test, and Audit.
- In the Period field, tap the Calendar icon to select the start and end date.
- Tap Add Item to add multiple items.
Note: You can add multiple items.
- Select Category from the dropdown list.
- Flat Pay
- Pre-Test Prep Cancelled Event
- Facility Audit
- Expenses Cancelled Attended Event
- Referral Bonus
- Trivia Winner Bonus
- Grievance
- PO Box Expense
- Admin Time
- Expenses Unscheduled Event
- Hourly
- Expenses Unscheduled Event
- E-Learning
- Onboarding Host
- Expenses Onboarding
- Cell Phone Stipend
- Misc Bonus
- Fill in the mandatory fields, including description, and Hours (the Amount added automatically based on the category and working hours).
- In the Invoice Files field, select File Category from the dropdown.
- Enter the file name in the File Label field you want to upload. Then tap the Choose File option below, select the File from your local device, and tap Open.
- After you select the file, tap Upload to upload your file.
Note: You can add multiple files if necessary.
- Once you have updated all the necessary information, tap Submit Invoice to submit. Or tap Cancel to exit the window without saving.